Showing posts with label Bootstrap. Show all posts

Monday 20 September 2021

Bootstrap Buttons

Bootstrap Button's provides several predefined button styles, each serving its own purpose. The button classes can be used on <a>, <button>, or <input> elements. Differect custom button styles include btn, btn-primary, btn-secondary, btn-success, btn-danger, btn-warning, btn-info, btn-light, btn-dark, btn-link etc. To avoid text to wrap, use the .text-nowrap class to the bootstrap button. 

Code :

<!DOCTYPE html>
<html lang="en">
<head>
    <title>Bootstrap Button's - Button Styles</title>
    <meta charset="utf-8">
    <meta name="viewport" content="width=device-width, initial-scale=1">
    <link href="https://cdn.jsdelivr.net/npm/bootstrap@5.0.2/dist/css/bootstrap.min.css" rel="stylesheet">
    <script src="https://cdn.jsdelivr.net/npm/bootstrap@5.0.2/dist/js/bootstrap.bundle.min.js"></script>
</head>
<body>

    <div class="container">
        <div class="card">
            <div class="card-header">
                <h2>Bootstrap Button's - Button Styles</h2>
            </div>
            <div class="card-body">
                <button type="button" class="btn">Basic</button>
                <button type="button" class="btn btn-primary">Primary</button>
                <button type="button" class="btn btn-secondary">Secondary</button>
                <button type="button" class="btn btn-dark">Dark</button>
                <button type="button" class="btn btn-success">Success</button>
                <button type="button" class="btn btn-info">Info</button>
                <button type="button" class="btn btn-warning">Warning</button>
                <button type="button" class="btn btn-danger">Danger</button>
                <button type="button" class="btn btn-light">Light</button>
                <button type="button" class="btn btn-link">Link</button>
            </div>
        </div>
    </div>

</body>
</html>

Output :


Bootstrap Button's

Bootstrap Outline Button's

Bootstrap provides outline/bordered buttons with an additional "hover" effect. Bootstrap Outline Button's use classes btn-outline-primary, btn-outline-secondary, btn-outline-success, btn-outline-danger, btn-outline-warning, btn-outline-info, btn-outline-light, btn-outline-dark etc.

Code :

<!DOCTYPE html>
<html lang="en">
<head>
    <title>Bootstrap Outline Button's - Button Styles</title>
    <meta charset="utf-8">
    <meta name="viewport" content="width=device-width, initial-scale=1">
    <link href="https://cdn.jsdelivr.net/npm/bootstrap@5.0.2/dist/css/bootstrap.min.css" rel="stylesheet">
    <script src="https://cdn.jsdelivr.net/npm/bootstrap@5.0.2/dist/js/bootstrap.bundle.min.js"></script>
</head>
<body>
    
    <div class="container">
        <div class="card">
            <div class="card-header">
                <h2>Bootstrap Outline Button's - Button Styles</h2>
            </div>
            <div class="card-body">
                <button type="button" class="btn btn-outline-primary">Primary</button>
                <button type="button" class="btn btn-outline-secondary">Secondary</button>
                <button type="button" class="btn btn-outline-dark">Dark</button>
                <button type="button" class="btn btn-outline-success">Success</button>
                <button type="button" class="btn btn-outline-info">Info</button>
                <button type="button" class="btn btn-outline-warning">Warning</button>
                <button type="button" class="btn btn-outline-light">Light</button>
                <button type="button" class="btn btn-outline-danger">Danger</button>
    
            </div>
        </div>
    </div>

</body>
</html>

Output :


Bootstrap Outline Button's

Bootstrap Button Tags

Bootstrap Button style classes can be used with <button> element, <a> element or <input> element. When using bootstrap button  classes with <a> element for triggering page functionality rather than linking to new page mension button tag role="button" to convey there message to screen readers.

Code :

<!DOCTYPE html>
<html lang="en">
<head>
    <title>Bootstrap Button's - Button Tag</title>
    <meta charset="utf-8">
    <meta name="viewport" content="width=device-width, initial-scale=1">
    <link href="https://cdn.jsdelivr.net/npm/bootstrap@5.0.2/dist/css/bootstrap.min.css" rel="stylesheet">
    <script src="https://cdn.jsdelivr.net/npm/bootstrap@5.0.2/dist/js/bootstrap.bundle.min.js"></script>
</head>
<body>
   
    <div class="container">
        <div class="card">
            <div class="card-header">
                <h2>Bootstrap Button's - Button Tag</h2>
            </div>
            <div class="card-body">
                <a class="btn btn-info" href="#" role="button">Link</a>
                <button class="btn btn-info" type="submit">Button</button>
                <input class="btn btn-info" type="button" value="Input">
                <input class="btn btn-info" type="submit" value="Submit">
                <input class="btn btn-info" type="reset" value="Reset">

            </div>
        </div>
    </div>

</body>
</html>


Output :


Bootstrap Button's - Button Tag


Thursday 16 September 2021

Bootstrap Badges .badge

Bootstrap Badges are used to add additional information to any content.

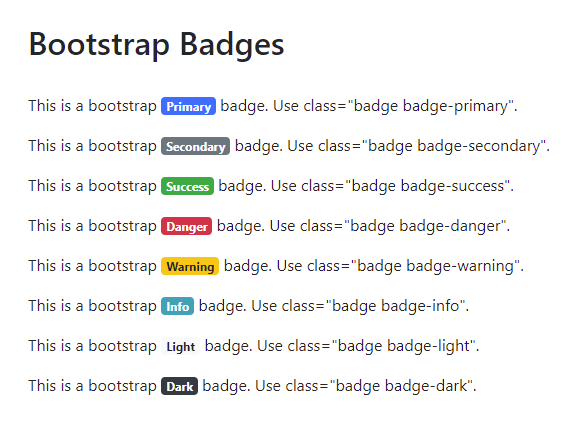
To display information as badge use .badge class together with a contextual class like .badge-primary, .badge-secondary, badge-success, badge-danger, badge-warning, badge-info, badge-light, badge-dark etc.. within <span> elements to create rectangular badges. Badges scale to match the size of the immediate parent element by using relative font sizing and em units. Badges can be used as part of links or buttons to provide additional information.

Bootstrap Badges Example

Code :


<!DOCTYPE html>
<html lang="en">
<head>
<title>Bootstrap Badges Example</title>
<meta charset="utf-8">
<meta name="viewport" content="width=device-width, initial-scale=1">
<link rel="stylesheet" href="https://maxcdn.bootstrapcdn.com/bootstrap/4.5.2/css/bootstrap.min.css">
<script src="https://ajax.googleapis.com/ajax/libs/jquery/3.5.1/jquery.min.js"></script>
<script src="https://cdnjs.cloudflare.com/ajax/libs/popper.js/1.16.0/umd/popper.min.js"></script>
<script src="https://maxcdn.bootstrapcdn.com/bootstrap/4.5.2/js/bootstrap.min.js"></script>
</head>
<body>
<div class="container">
<h2>Bootstrap Badges</h2>
<p>
This is a bootstrap <span class="badge badge-primary">Primary</span> badge. Use class="badge badge-primary".
</p>
<p>
This is a bootstrap <span class="badge badge-secondary">Secondary</span> badge. Use class="badge badge-secondary".
</p>
<p>
This is a bootstrap <span class="badge badge-success">Success</span> badge. Use class="badge badge-success".
</p>
<p>
This is a bootstrap <span class="badge badge-danger">Danger</span> badge. Use class="badge badge-danger".
</p>
<p>
This is a bootstrap <span class="badge badge-warning">Warning</span> badge. Use class="badge badge-warning".
</p>
<p>
This is a bootstrap <span class="badge badge-info">Info</span> badge. Use class="badge badge-info".
</p>
<p>
This is a bootstrap <span class="badge badge-light">Light</span> badge. Use class="badge badge-light".
</p>
<p>
This is a bootstrap <span class="badge badge-dark">Dark</span> badge. Use class="badge badge-dark".
</p>
</div>
</body>
</html>

Output :

Bootstrap Badge

Bootstrap Badges With Pill Example

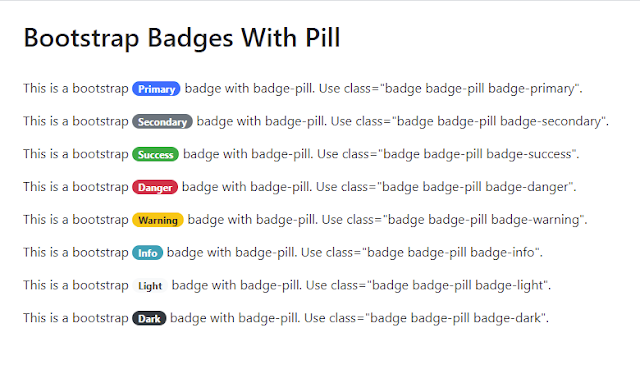
To display badges more rounded with a larger border-radius use the badge-pill utility class. Below is the example of a badge-pill.

Code :

<!DOCTYPE html>
<html lang="en">
<head>
<title>Bootstrap Badges With Pill Example</title>
<meta charset="utf-8">
<meta name="viewport" content="width=device-width, initial-scale=1">
<link rel="stylesheet" href="https://maxcdn.bootstrapcdn.com/bootstrap/4.5.2/css/bootstrap.min.css">
<script src="https://ajax.googleapis.com/ajax/libs/jquery/3.5.1/jquery.min.js"></script>
<script src="https://cdnjs.cloudflare.com/ajax/libs/popper.js/1.16.0/umd/popper.min.js"></script>
<script src="https://maxcdn.bootstrapcdn.com/bootstrap/4.5.2/js/bootstrap.min.js"></script>
</head>

<body>
<div class="container">
<h2>Bootstrap Badges With Pill</h2>
<p>
This is a bootstrap <span class="badge badge-pill badge-primary">Primary</span> badge with badge-pill. Use class="badge badge-pill badge-primary".
</p>
<p>
This is a bootstrap <span class="badge badge-pill badge-secondary">Secondary</span> badge with badge-pill. Use class="badge badge-pill badge-secondary".
</p>
<p>
This is a bootstrap <span class="badge badge-pill badge-success">Success</span> badge with badge-pill. Use class="badge badge-pill badge-success".
</p>
<p>
This is a bootstrap <span class="badge badge-pill badge-danger">Danger</span> badge with badge-pill. Use class="badge badge-pill badge-danger".
</p>
<p>
This is a bootstrap <span class="badge badge-pill badge-warning">Warning</span> badge with badge-pill. Use class="badge badge-pill badge-warning".
</p>
<p>
This is a bootstrap <span class="badge badge-pill badge-info">Info</span> badge with badge-pill. Use class="badge badge-pill badge-info".
</p>
<p>
This is a bootstrap <span class="badge badge-pill badge-light">Light</span> badge with badge-pill. Use class="badge badge-pill badge-light".
</p>
<p>
This is a bootstrap <span class="badge badge-pill badge-dark">Dark</span> badge with badge-pill. Use class="badge badge-pill badge-dark".
</p>
</div>
</body>
</html>

Output :

Bootstrap Badge - badge-pill


Wednesday 15 September 2021

Bootstrap Alerts

Bootstrap Alerts provides contextual feedback messages for typical user actions with a handful of available and flexible alert messages. Bootstrap provides an easy way to create predefined alert messages with Bootstrap Alert.

Bootstrap Alert Example

Bootstrap Alerts are available for any length of text, as well as an optional dismiss button. For proper styling, use one of the required contextual classes alert-primary, alert-secondary,alert-success,alert-danger,alert-warning,alert-info,alert-dark.

Code :


<!DOCTYPE html>
<html lang="en">
<head>

<title>Bootstrap Alerts Example</title>
<meta charset="utf-8">
<meta name="viewport" content="width=device-width, initial-scale=1">
<link rel="stylesheet" href="https://maxcdn.bootstrapcdn.com/bootstrap/4.5.2/css/bootstrap.min.css">
<script src="https://ajax.googleapis.com/ajax/libs/jquery/3.5.1/jquery.min.js"></script>
<script src="https://cdnjs.cloudflare.com/ajax/libs/popper.js/1.16.0/umd/popper.min.js"></script>
<script src="https://maxcdn.bootstrapcdn.com/bootstrap/4.5.2/js/bootstrap.min.js"></script>

</head>
<body>

<div class="container">
<br/>
<h2>Bootstrap Alerts</h2>
<br/>

<div class="alert alert-primary" role="alert">
This is a bootstrap primary alert. Use class="alert alert-primary".
</div>

<div class="alert alert-secondary" role="alert">
This is a bootstrap secondary alert. Use class="alert alert-secondary".
</div>

<div class="alert alert-success" role="alert">
This is a bootstrap success alert. Use class="alert alert-success".
</div>

<div class="alert alert-danger" role="alert">
This is a bootstrap danger alert. Use class="alert alert-danger".
</div>

<div class="alert alert-warning" role="alert">
This is a bootstrap warning alert. Use class="alert alert-warning".
</div>

<div class="alert alert-info" role="alert">
This is a bootstrap info alert. Use class="alert alert-info".
</div>

<div class="alert alert-dark" role="alert">
This is a bootstrap dark alert. Use class="alert alert-dark".
</div>

</div>
</body>
</html>

Output :

Bootstrap Alerts


Tuesday 14 September 2021

Bootstrap Card

A Bootstrap Card is a flexible and extensible content container. A Bootstrap Card is a bordered box with some padding around its content. It includes options for headers, footers, content, colors, etc.

Bootstrap Card is built with as little markup and styles as possible but still manages to deliver a ton of control and customization. Built with flexbox, they offer easy alignment and mix well with other Bootstrap components.

Basic Bootstrap Card Example

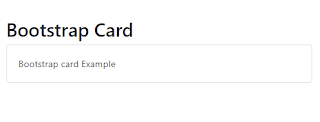
A basic bootstrap card is created with the .card class, and the content inside the card has a .card-body class.

Code :

<!DOCTYPE html>
<html lang="en">
<head>
<title>Bootstrap Card Example</title>
<meta charset="utf-8">
<meta name="viewport" content="width=device-width, initial-scale=1">
<link rel="stylesheet" href="https://maxcdn.bootstrapcdn.com/bootstrap/4.5.2/css/bootstrap.min.css">
<script src="https://ajax.googleapis.com/ajax/libs/jquery/3.5.1/jquery.min.js"></script>
<script src="https://cdnjs.cloudflare.com/ajax/libs/popper.js/1.16.0/umd/popper.min.js"></script>
<script src="https://maxcdn.bootstrapcdn.com/bootstrap/4.5.2/js/bootstrap.min.js"></script>
</head>
<body>

<div class="container">

<h2>Bootstrap Card</h2>
<div class="card">
<div class="card-body">Bootstrap card Example</div>
</div>
</div>

</body>
</html>

Output:

Bootstrap Card
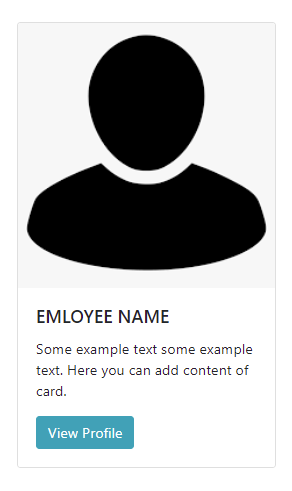
Below is another example of a basic card with mixed content and a fixed width. Cards have no fixed width to start, so they’ll naturally fill the full width of their parent element. This can be easily customized with various sizing options.


<!DOCTYPE html>
<html lang="en">
<head>
<title>Bootstrap Card Example</title>
<meta charset="utf-8">
<meta name="viewport" content="width=device-width, initial-scale=1">
<link rel="stylesheet" href="https://maxcdn.bootstrapcdn.com/bootstrap/4.5.2/css/bootstrap.min.css">
<script src="https://ajax.googleapis.com/ajax/libs/jquery/3.5.1/jquery.min.js"></script>
<script src="https://cdnjs.cloudflare.com/ajax/libs/popper.js/1.16.0/umd/popper.min.js"></script>
<script src="https://maxcdn.bootstrapcdn.com/bootstrap/4.5.2/js/bootstrap.min.js"></script>
</head>
<body>

<div class="card" style="width: 18rem;">
<img class="card-img-top" src="bootstrapcard.png" alt="Card image cap">
<div class="card-body">
<h5 class="card-title">EMLOYEE NAME</h5>
<p class="card-text">Some example text some example text. Here you can add content of card...</p>
<a href="#" class="btn btn-info">View Profile</a>
</div>
</div>
</body>
</html>


Bootstrap Card

Tuesday 24 August 2021

Bootstrap .container-fluid Class

Bootstrap requires a containing element to wrap site contents. In bootstrap, there are two container classes .container and .container-fluid. The bootstrap .container-fluid class provides a full-width container, spanning the entire width of the viewport. Use the .container-fluid class to create a full-width container, that will always span the entire width of the screen (width is always 100%).

.container-fluid class Example

<!DOCTYPE html>
<html lang="en">
<head>
    <title>Bootstrap container-fluid class Example</title>
    <meta charset="utf-8">
    <meta name="viewport" content="width=device-width, initial-scale=1">
    <link rel="stylesheet" href="https://maxcdn.bootstrapcdn.com/bootstrap/4.5.2/css/bootstrap.min.css">
    <script src="https://ajax.googleapis.com/ajax/libs/jquery/3.5.1/jquery.min.js"></script>
    <script src="https://cdnjs.cloudflare.com/ajax/libs/popper.js/1.16.0/umd/popper.min.js"></script>
    <script src="https://maxcdn.bootstrapcdn.com/bootstrap/4.5.2/js/bootstrap.min.js"></script>
</head>
<body>

    <div class="container-fluid bg-primary text-white p-4 mt-4">
        <h1>Bootstrap .container-fluid class</h1>
        <p>This content is inside a .container-fluid class.</p>
        <p>The .container-fluid class provides a full width container, spanning the entire width of the viewport.</p>
    </div>
</body>
</html>


Bootstrap .container-fluid Class


Monday 23 August 2021

Bootstrap .container Class

Bootstrap requires a containing element to wrap site contents. In bootstrap, there are two container classes .container and .container-fluidBootstrap .container class provides a responsive fixed width container. Use the .container class to create a responsive, fixed-width container. 

bootstrap container size chart

.container class Example

<!DOCTYPE html>
<html lang="en">
<head>
    <title>Bootstrap .container class</title>
    <meta charset="utf-8">
    <meta name="viewport" content="width=device-width, initial-scale=1">
    <link rel="stylesheet" href="https://maxcdn.bootstrapcdn.com/bootstrap/4.5.2/css/bootstrap.min.css">
    <script src="https://ajax.googleapis.com/ajax/libs/jquery/3.5.1/jquery.min.js"></script>
    <script src="https://cdnjs.cloudflare.com/ajax/libs/popper.js/1.16.0/umd/popper.min.js"></script>
    <script src="https://maxcdn.bootstrapcdn.com/bootstrap/4.5.2/js/bootstrap.min.js"></script>
</head>
<body>

    <div class="container bg-primary text-white p-4 mt-4">
        <h1>Bootstrap .container class</h1>
        <p>This content is inside a .container class.</p>
        <p>The .container class provides a responsive fixed width container.</p>
    </div>
    
</body>
</html>


Bootstrap .container Class


Sunday 22 August 2021

Bootstrap Grid (Grid System)

The bootstrap grid system uses a series of containers, rows, and columns to layout and aligns content. It’s built with a flexbox and is fully responsive. Bootstrap grid allows up to 12 columns across the page.
If you do not want to use all 12 columns individually, you can group the columns together to create wider columns.
The grid system is responsive, and the columns will be re-arranged automatically as per the screen size.
Make sure that the sum adds up to 12 or fewer. It is not required that you use all 12 available columns.

Grid Classes

The Bootstrap grid system has the following classes:
.col- (extra small devices - screen width less than 576px)
.col-sm- (small devices - screen width equal to or greater than 576px)
.col-md- (medium devices - screen width equal to or greater than 768px)
.col-lg- (large devices - screen width equal to or greater than 992px)
.col-xl- (xlarge devices - screen width equal to or greater than 1200px)

The classes above can be combined to create more dynamic and flexible layouts.

Each class scales up, so if you wish to set the same widths for sm and md, you only need to specify sm.

Bootstrap Grid (Grid System)


Saturday 21 August 2021

Bootstrap Container

Bootstrap requires a containing element to wrap site contents. Containing element is called as container.

In bootstrap there are two container classes to choose from :

1. .container class provides a responsive fixed width container. Use the .container class to create a responsive, fixed-width container. 

bootstrap container size chart

2. .container-fluid class provides a full-width container, spanning the entire width of the viewport. Use the .container-fluid class to create a full-width container, that will always span the entire width of the screen (width is always 100%).

Bootstrap Container Example

<!DOCTYPE html>
<html lang="en">
<head>
    <title>Bootstrap Example</title>
    <meta charset="utf-8">
    <meta name="viewport" content="width=device-width, initial-scale=1">
    <link rel="stylesheet" href="https://maxcdn.bootstrapcdn.com/bootstrap/4.5.2/css/bootstrap.min.css">
    <script src="https://ajax.googleapis.com/ajax/libs/jquery/3.5.1/jquery.min.js"></script>
    <script src="https://cdnjs.cloudflare.com/ajax/libs/popper.js/1.16.0/umd/popper.min.js"></script>
    <script src="https://maxcdn.bootstrapcdn.com/bootstrap/4.5.2/js/bootstrap.min.js"></script>
</head>
<body>

    <div class="container bg-primary text-white p-4 mt-4">
        <h1>Bootstrap .container class</h1>
        <p>This content is inside a .container class.</p>
        <p>The .container class provides a responsive fixed width container.</p>
    </div>
    <div class="container-fluid bg-primary text-white p-4 mt-4">
        <h1>Bootstrap .container-fluid class</h1>
        <p>This content is inside a .container-fluid class.</p>
        <p>The .container-fluid class provides a full width container, spanning the entire width of the viewport.</p>
    </div>
</body>
</html>


Bootstrap Container


Friday 20 August 2021

What is Responsive Web Design (Responsive Website)?

Responsive web design (Responsive Website) is about creating websites that automatically adjust themselves to look good on all devices, from small phones to large desktops. A responsive web design (Responsive Website) will automatically adjust for different screen sizes and viewports.

Setting the viewport

To create a responsive website, it is required to add the <meta> tag with the name "viewport" to all your web pages.

<meta name="viewport" content="width=device-width, initial-scale=1.0">

This will set the viewport of your page, which will give the browser instructions on how to control the page's dimensions and scaling.

Viewport is the browser window size. 1vw = 1% of viewport width. If the viewport is 50cm wide, 1vw is 0.5cm.

Responsive Web Design output

Bootstrap Desktop Responsive Design Display

Bootstrap Mobile Responsive Design Display


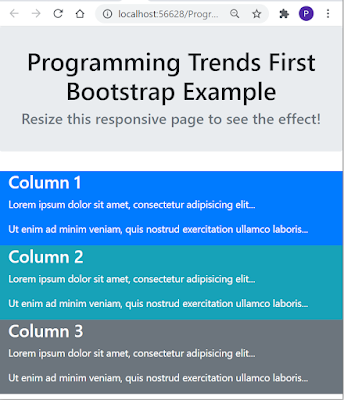
Bootstrap Example

Bootstrap is a powerful toolkit - a collection of HTML, CSS, and JavaScript tools for creating and building web pages and web applications. It is a free and open-source project, hosted on GitHub, and originally created by (and for) Twitter.

Bootstrap Example 

<!DOCTYPE html>
<html lang="en">
<head>
    <title>Bootstrap Example</title>
    <meta charset="utf-8">
    <meta name="viewport" content="width=device-width, initial-scale=1">
    <link rel="stylesheet" href="https://maxcdn.bootstrapcdn.com/bootstrap/4.5.2/css/bootstrap.min.css">
    <script src="https://ajax.googleapis.com/ajax/libs/jquery/3.5.1/jquery.min.js"></script>
    <script src="https://cdnjs.cloudflare.com/ajax/libs/popper.js/1.16.0/umd/popper.min.js"></script>
    <script src="https://maxcdn.bootstrapcdn.com/bootstrap/4.5.2/js/bootstrap.min.js"></script>
</head>
<body>
    <div class="jumbotron text-center">
        <h1>Programming Trends First Bootstrap Example</h1>
        <h4 class="text-secondary">Resize this responsive page to see the effect!</h4>
    </div>
    <div class="container">
        <div class="row">
            <div class="col-sm-4 bg-primary text-white">
                <h3>Column 1</h3>
                <p>Lorem ipsum dolor sit amet, consectetur adipisicing elit...</p>
                <p>Ut enim ad minim veniam, quis nostrud exercitation ullamco laboris...</p>
            </div>
            <div class="col-sm-4  bg-info text-white">
                <h3>Column 2</h3>
                <p>Lorem ipsum dolor sit amet, consectetur adipisicing elit...</p>
                <p>Ut enim ad minim veniam, quis nostrud exercitation ullamco laboris...</p>
            </div>
            <div class="col-sm-4 bg-secondary text-white">
                <h3>Column 3</h3>
                <p>Lorem ipsum dolor sit amet, consectetur adipisicing elit...</p>
                <p>Ut enim ad minim veniam, quis nostrud exercitation ullamco laboris...</p>
            </div>
        </div>
    </div>
</body>
</html>

Bootstrap Mobile Responsive Design Display

Bootstrap Mobile Responsive Design Display

Bootstrap Desktop Responsive Design Display

Bootstrap Desktop Responsive Design Display


Thursday 19 August 2021

What is Bootstrap? Why Bootstrap?

Bootstrap is a powerful toolkit - a collection of HTML, CSS, and JavaScript tools for creating and building web pages and web applications. It is a free and open-source project, hosted on GitHub, and originally created by (and for) Twitter.


Bootstrap


Why Bootstrap?

After its open-source release in 2011, Bootstrap became popular very quickly, and not without reason. Web designers and web developers like Bootstrap because it is flexible and easy to work with. Its main advantages are that it is responsive by design, it maintains wide browser compatibility, it offers consistent design by using re-usable components, and it is very easy to use and quick to learn. It offers rich extensibility using JavaScript, coming with built-in support for jQuery plugins and a programmatic JavaScript API. Bootstrap can be used with any IDE or editor, and any server-side technology and language, from ASP.NET to PHP to Ruby on Rails.

With Bootstrap, web developers can concentrate on the development work, without worrying about design, and get a good-looking website up and running quickly. Conversely, it gives web designers a solid foundation for creating interesting Bootstrap themes.